Windows 11

Learn about the steps required to set up your network on the Windows 11 operating system.
  • Click the Windows button on your keyboard, search for Settings, and open the application.
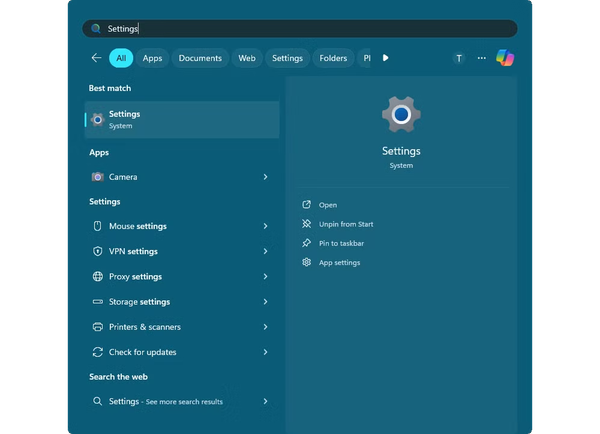
  • Open settings application
  • Navigate to the Network & internet section, and click on Properties.
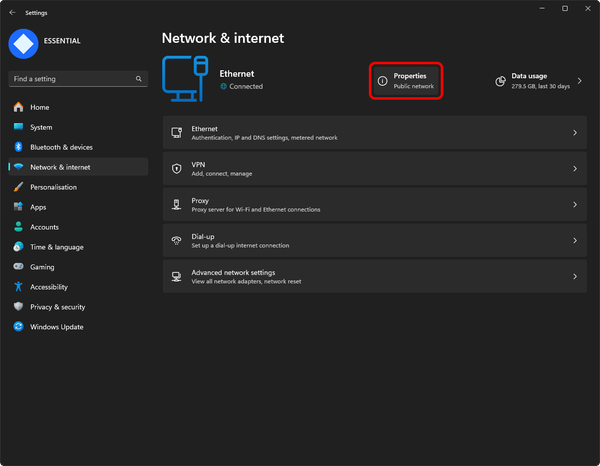
  • Open the network properties
  • Open up the Edit menu for DNS server assignment.
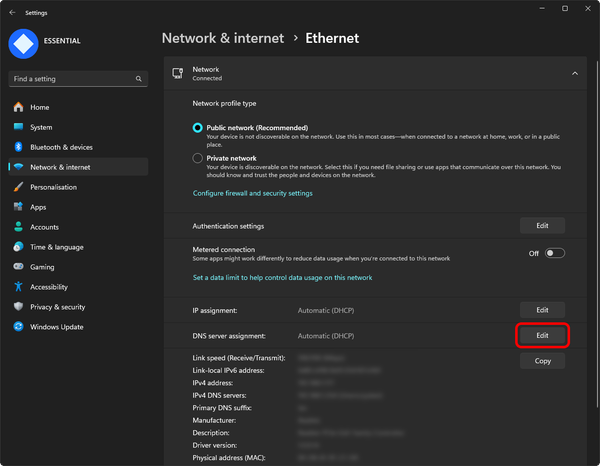
  • Open DNS server assignment edit menu
  • Select Manual from the first dropdown menu, and enable IPv4.
  • Input 1.1.1.1 for the Preferred DNS, and 1.0.0.1 for the Alternate DNS.
  • Enable DNS over HTTPS for both sections.
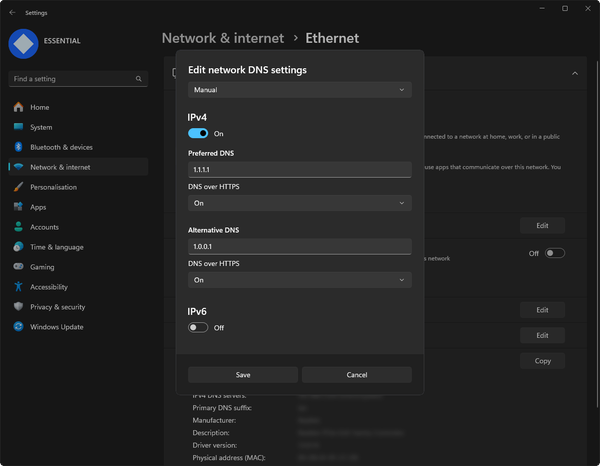
  • Edit DNS settings
  • Save your changes. Your changes should now be applied.

  • Related pages

    Network Setup Issue

    Essential Network Error

    Your browser is outdated! We have disabled some animations so that you can still use the site. Please consider updating your browser.

    Learn more

    Essential is using cookies to improve your browsing experience. By continuing to browse the site, you are agreeing to our use of cookies.

    Learn more about our use of cookies

    Storage Settings

    Essential is using cookies to improve your browsing experience. By continuing to browse the site, you are agreeing to our use of cookies.

    Required Storage

    Functional Storage

    Analysis Storage

    Marketing Storage